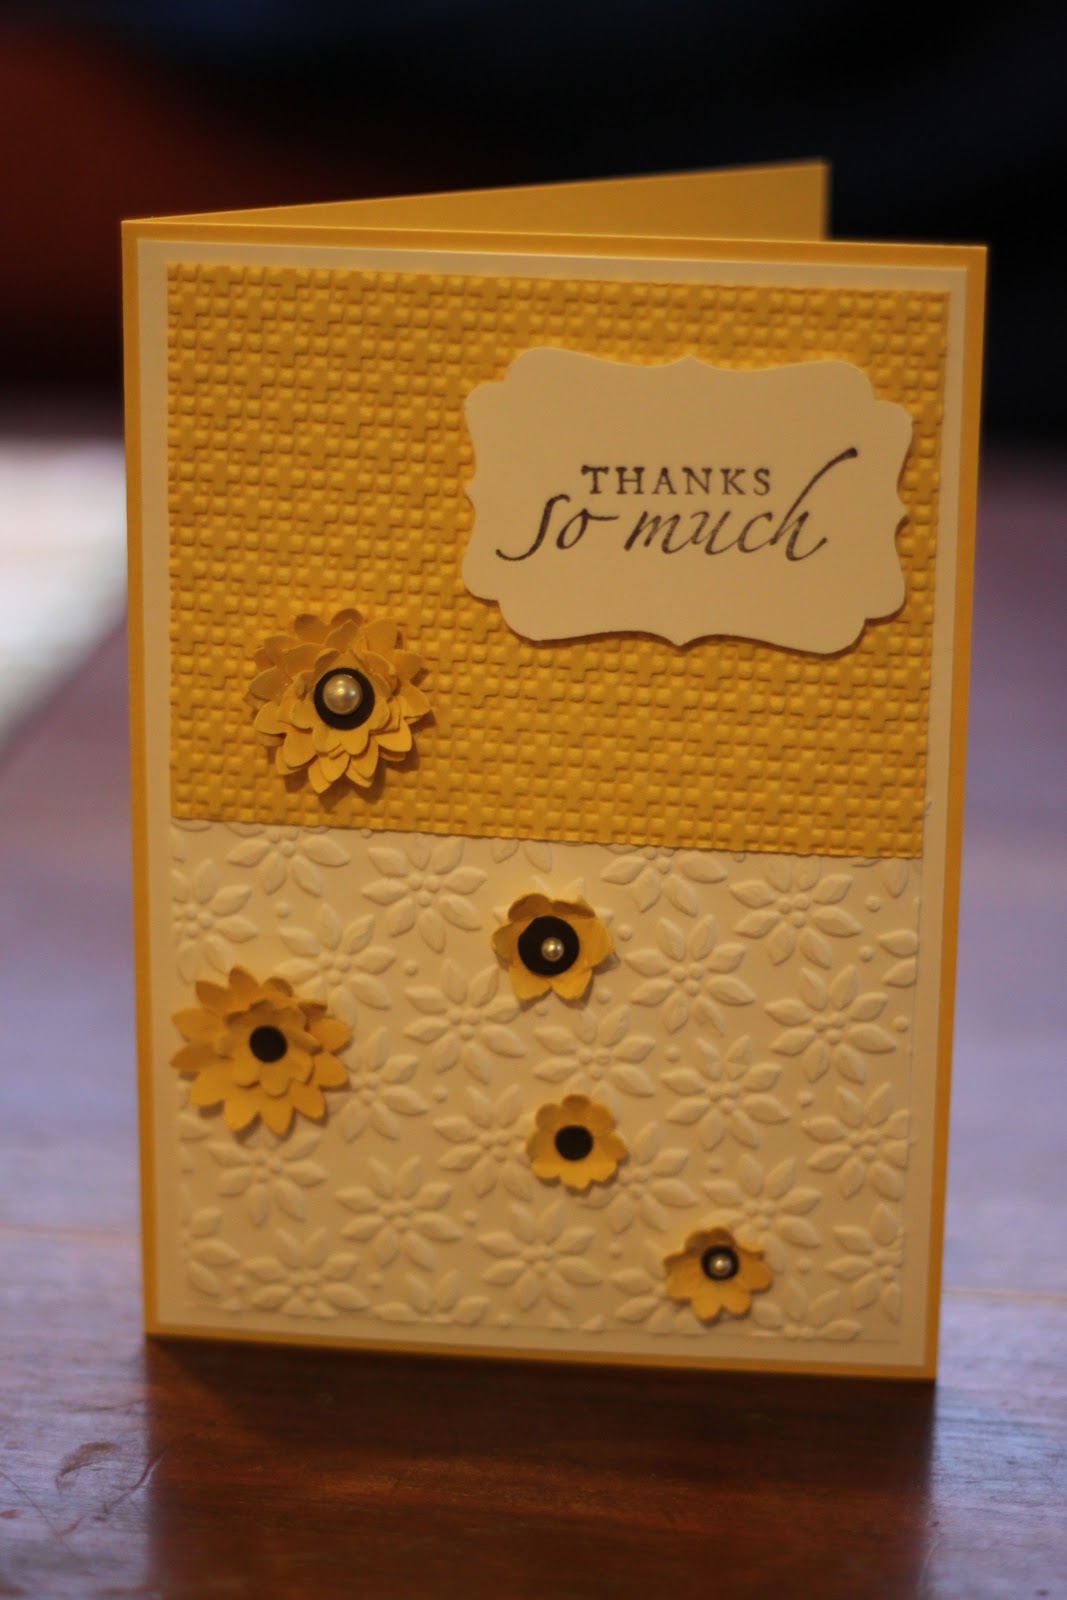
Today I had a little spare time on my hands and wanted to do something a little different than cards or boxes. I have had this project in mind for a while. I usually write my notes on a white board but it is a little sterile so I pulled out an old picture frame and set to work.
Here is my before
I just got a new pack of the gorgeous this and that epic day paper. Stampin' Up! have a fabulous special on at the moment - buy three packs of DSP and get a fourth one absolutely FREE. Who can turn down free. I was drawn to this pack by both the colours and the grunge feel.
I cut a piece of the DSP to fit into where the original art work was and did a little extra stampin directly to the paper in Calypso Coral using my new gorgeous grunge stamp set. I then used the opposite side of the dsp and covered the matt frame, adding a small amount of epic day washi tape at the edges. Some daffodil delight letters cut using my big shot finished the frame off. Since my walls are a lighter shade of yellow it really complements the wall when I hold it up and I can't wait to mount it. Here is the finished frame
If you want to purchase any of this paper (or any other packs) please flick me an email. I would happily help you out. Offer is available until the end of August.
Hope you enjoy.
Julz
Pages
Julie Butler - Independent Stampin' Up! Demonstrator
Julie Butler - Independent Stampin Up Demonstrator
Need to contact me? Email julzbutler@gmail.com
Thursday, August 15, 2013
Wednesday, August 14, 2013
Rainbow
Hiya followers
Long time no post. One day I might get good at this but for now hope you are all still watching.
I ran a techniques class last weekend and we created some gorgeous cards using a smashing acetate technique. This is not the card we made (that might wait until another day) however this piece was sitting on my desk after I designed my card and I saw the challenge sketch for Create with Connie and Mary here. I came up with this as my take on the sketch. It didn't quite photograph as pretty as it is in real life - the lighting washed the depth of the colour out. However I did want to post my entry. Gotta be in to win right!
I really like the pastel like effect I got. I mounted the whisper white onto the new smoky slate and finished with a little smoky slate chevron ribbon and a little bling.
Julz
Long time no post. One day I might get good at this but for now hope you are all still watching.
I ran a techniques class last weekend and we created some gorgeous cards using a smashing acetate technique. This is not the card we made (that might wait until another day) however this piece was sitting on my desk after I designed my card and I saw the challenge sketch for Create with Connie and Mary here. I came up with this as my take on the sketch. It didn't quite photograph as pretty as it is in real life - the lighting washed the depth of the colour out. However I did want to post my entry. Gotta be in to win right!
I really like the pastel like effect I got. I mounted the whisper white onto the new smoky slate and finished with a little smoky slate chevron ribbon and a little bling.
Julz
Wednesday, April 24, 2013
MDS!
So by no means am I anywhere near being proficient in the use of MDS (MY Digital Studio) which is the newest and most awesome addition to the Stampin Up range but I wanted to share this wee inspirational quote that I made tonight. I am still teaching myself how to use MDS. Decided that rather than watch the tuition videos that I would just start playing around. Sure it may end up being the "long way" around buy it sure it fun at the time. It is FAR from perfect but I still wanted to share in the hopes that other novice users may be inspired. MDS is actually quite easy once you get that hang of things.
This entire picture is dedicated to those friends of mine who do really accept me as I am - all my flaws and all. Love you all. xxx
Monday, April 22, 2013
Just add technique
Over at Just add ink this week they have a great challenge. Just add a new technique you haven't tried before.
I needed to produce a couple of mothers day cards for an order and thought that this card I saw recently by the amazing Catherine Pooler would be a fantastic one to case. Im not even certain that there is a name for this technique but I want to call it "paint meets ink". I kept my case fairly similar, using different colours inspired by the few test pots of paint that were lying around the house (yep thats regular old house paint).
This card is also very special because it is a hybrid card. What is a "hybrid" card. It uses a combination of old fashioned ink stamping and the new digital stamping program Stampin Up have just released. It is called My Digital Studio (MDS) and you can check it out here I must say I am extremely taken with the program. It is FREE to trial with a 30 day trial and less than thirty dollars to purchase. If you wish to purchase it follow the links and don't forget to put my name in as your demonstrator (Julie Butler).
I used MDS on this card to print the tree and the sentiment. I didn't have either of the stamps and for a minimal charge I could download them to add to my collection. This is a fabulous way to build up your sentiment collection and with a good colour printer the sky is the limit when it comes to printing stamp images.
Anyway - I hope you like the card, the purchaser certainly did.
PS - check out all of Catherine Pooler's videos. She is a fantastic inspiration.
Julz
I needed to produce a couple of mothers day cards for an order and thought that this card I saw recently by the amazing Catherine Pooler would be a fantastic one to case. Im not even certain that there is a name for this technique but I want to call it "paint meets ink". I kept my case fairly similar, using different colours inspired by the few test pots of paint that were lying around the house (yep thats regular old house paint).
This card is also very special because it is a hybrid card. What is a "hybrid" card. It uses a combination of old fashioned ink stamping and the new digital stamping program Stampin Up have just released. It is called My Digital Studio (MDS) and you can check it out here I must say I am extremely taken with the program. It is FREE to trial with a 30 day trial and less than thirty dollars to purchase. If you wish to purchase it follow the links and don't forget to put my name in as your demonstrator (Julie Butler).
I used MDS on this card to print the tree and the sentiment. I didn't have either of the stamps and for a minimal charge I could download them to add to my collection. This is a fabulous way to build up your sentiment collection and with a good colour printer the sky is the limit when it comes to printing stamp images.
Anyway - I hope you like the card, the purchaser certainly did.
PS - check out all of Catherine Pooler's videos. She is a fantastic inspiration.
Julz
Thursday, February 21, 2013
2 posts in one night!
But only because I wanted to join in with the still addinktive challenge.
They came up with a gorgeous combination sketch and colour challenge. While I am still keen to play with the colour challenge I had a few bits and pieces sitting on my table that were left over from another project I had been working on and wanted to add another card to my stock for markets.
This is the resulting card. I flipped the sketch sideways and then also flipped the sentiment panel but I am really quite please with the resulting card.
Julz
They came up with a gorgeous combination sketch and colour challenge. While I am still keen to play with the colour challenge I had a few bits and pieces sitting on my table that were left over from another project I had been working on and wanted to add another card to my stock for markets.
This is the resulting card. I flipped the sketch sideways and then also flipped the sentiment panel but I am really quite please with the resulting card.
Julz
Love is in the air
In the form of wedding invitations.................
I was asked by my good friend Gemma to design her wedding invitations, which was a huge honour but also incredibly scary at the same time.
I came up with a few different designs but on consultation with the bride to be we settled on the eventual invitation.
70 odd invitations later - and a few extra grey hairs,not only was the bride happy with the final result, but word on the street is that recipients also think they are great which is a huge rush.
Anyway - thought my blog followers would enjoy seeing some pictures of what I have been up to. If you are interested in having me design your invitations please contact me for a quote. I am happy to work in with your budget, colour schemes and design ideas.
Julz
I was asked by my good friend Gemma to design her wedding invitations, which was a huge honour but also incredibly scary at the same time.
I came up with a few different designs but on consultation with the bride to be we settled on the eventual invitation.
70 odd invitations later - and a few extra grey hairs,not only was the bride happy with the final result, but word on the street is that recipients also think they are great which is a huge rush.
Anyway - thought my blog followers would enjoy seeing some pictures of what I have been up to. If you are interested in having me design your invitations please contact me for a quote. I am happy to work in with your budget, colour schemes and design ideas.
Julz
| Simple and yet elegant (eggplant that is) |
| Insert - printed on silver paper |
| Just a selection |
Monday, September 17, 2012
A little bit obsessed with the Petite Purse Die
I am completely and totally in love with these purses and have been playing around this weekend with the die on and off. This wee combination was made this morning as it is the birthday of a friend of mine and I wanted to take her a little gift. Hope you like the combination of purse and card.
(Edit - made a hasty altered paper bag to pop the gift in and protect it)
This purse does use some retired DSP but it was just too pretty to blog in my opinion. The crumb cake tulle ribbon from the new catalogue helped create the gorgeous bow and I sponged the organza ribbon with pool party ink to coordinate.
Julz
x
(Edit - made a hasty altered paper bag to pop the gift in and protect it)
This purse does use some retired DSP but it was just too pretty to blog in my opinion. The crumb cake tulle ribbon from the new catalogue helped create the gorgeous bow and I sponged the organza ribbon with pool party ink to coordinate.
Julz
x
Thursday, September 13, 2012
Petite purse die - finally!
Hiya
I finally got my Stampin Up order earlier this week and managed to have a wee play with it today. I made this gorgeous wee purse with the big shot die and then embossed it with my new lacy brocade embossing folder. A button with some thin ribbon and gold brads to adhere the handle finished the elegant look of the purse and the addition of small magnets helps hold it closed without stressing the cardstock. I filled the purse with Hersheys kisses.
This purse is heading off to a friend as a gift along with an altered jar to be used as a pen holder. I have plenty of altered jars on my table to hold all my pens and tools and this particular friend admired one of my jars yesterday so I decided to make one in her favourite colour which is purple. She had admired the Rich Razzleberry so it was the obvious choice to use. A leftover coffee jar (Screaming Turtle) and some of the DSP colour stacks made a great base to add some letters and a tiny wee flower made with the new scallop punch from the Christmas Catalogue. A few pieces of ribbon finished off the look. I am hoping she loves this gift and that it brings great cheer to her.
I finally got my Stampin Up order earlier this week and managed to have a wee play with it today. I made this gorgeous wee purse with the big shot die and then embossed it with my new lacy brocade embossing folder. A button with some thin ribbon and gold brads to adhere the handle finished the elegant look of the purse and the addition of small magnets helps hold it closed without stressing the cardstock. I filled the purse with Hersheys kisses.
This purse is heading off to a friend as a gift along with an altered jar to be used as a pen holder. I have plenty of altered jars on my table to hold all my pens and tools and this particular friend admired one of my jars yesterday so I decided to make one in her favourite colour which is purple. She had admired the Rich Razzleberry so it was the obvious choice to use. A leftover coffee jar (Screaming Turtle) and some of the DSP colour stacks made a great base to add some letters and a tiny wee flower made with the new scallop punch from the Christmas Catalogue. A few pieces of ribbon finished off the look. I am hoping she loves this gift and that it brings great cheer to her.
Thursday, August 23, 2012
Birthday boy
My youngest son turns 15 today - a rather scary thing truth be told. I wanted to make a special card for him and turned to his favourite obsession for inspiration - Minecraft. To be honest I don't know much about the game he plays except it involves spending hours on the computer so I went to trusty google for some sort of image I could use. Turns out Minecraft is extremely pixelated so I used a picture I found and recreated it using tiny 1cm x 1cm squares of cardstock. Despite being difficult to line up completely perfectly I am still fairly happy with how this card turned out. It was definitely a labour of love - 100 squares of paper for the base and the little black pieces (which are meant to be a creeper) are popped up on dimensionals.
Hope you enjoy looking.
Julz
Hope you enjoy looking.
Julz
Thursday, July 12, 2012
Happy birthday Dad
Today is my fathers birthday and I really wanted to share the gorgeous card and coordinating jar of liquorice allsorts I made for him with my readers.
I took a regular pasta jar and using my circle dies and punches cut firstly a cardstock circle layered with another circle of DSP. I used the now retired elegant soiree which I really love and just happened to have a little scrap floating around. I glued these to the lid, covered with a layer of crystal effects and left to dry overnight. Once that was all done I layered in the sweets and then finished the jar off with a double bow of crumb cake seam binding. I just love how easy it is to take simple things and turn them into something spectacular.
Hope you enjoy looking.
Julz
I took a regular pasta jar and using my circle dies and punches cut firstly a cardstock circle layered with another circle of DSP. I used the now retired elegant soiree which I really love and just happened to have a little scrap floating around. I glued these to the lid, covered with a layer of crystal effects and left to dry overnight. Once that was all done I layered in the sweets and then finished the jar off with a double bow of crumb cake seam binding. I just love how easy it is to take simple things and turn them into something spectacular.
Hope you enjoy looking.
Julz
Friday, July 6, 2012
Take one design
And mix it up. I came across this card by Georgeann Manning somewhere in my websurfing and of course as all good crafters do pinned it to my cardspiration board on Pinterest. Because I am busy getting ready for a few craft fairs I needed to add to my current stock and it really is smart to be cutting several of the same basic design at once. Hope you like my take on Georgeann's cards. Sorry the photography isn't the best, usually hubby helps but I wanted to get these all snapped and then packaged up.
Julz
Julz
Wednesday, July 4, 2012
Funky kids cards
Well at least I think so.
I have two markets coming up this weekend. The first at Lindale Farm in Kapiti Coast on Saturday and the second on Sunday is a brand new Underground Market at the Dowse Art Museum in Lower Hutt. I am really looking forward to these markets but at the same time needed to add to my collection of cards on hand. I absolutely love the Big Top Birthday DSP, especially great for cards for the young at heart. Hope you like the selection of cards I made today, would love to hear your feedback as to which ones are your favourites.
Julz
I have two markets coming up this weekend. The first at Lindale Farm in Kapiti Coast on Saturday and the second on Sunday is a brand new Underground Market at the Dowse Art Museum in Lower Hutt. I am really looking forward to these markets but at the same time needed to add to my collection of cards on hand. I absolutely love the Big Top Birthday DSP, especially great for cards for the young at heart. Hope you like the selection of cards I made today, would love to hear your feedback as to which ones are your favourites.
Julz
Sunday, June 17, 2012
Long time MIA again
This blogging thing really is a bit of a challenge for me I must say. I am trying however, so who knows maybe you will see some more this week.
Last night I went to my sisters 40th birthday party so I want to share with you the gift and card - all made with love by me using SU products. Please excuse the photography, we were running late to leave for the party so these were taken around 2am back at her house on hubbies Iphone so quality is not brilliant.
Her favourite colours are red and purple so I opted to put Real Red and Elegant Eggplant together with black to come up with this bold combination for her card, with the focal point of the card being the sparkly panel and 40.
The gift is a recycled can which I wrapped with Black grossgrain ribbon and then finished with a flower made using the blossom punch. This I filled with hersheys kisses and it contained the two roses in Real Red and Elegant Eggplant - they are actually pens, I fashion the roses to the pens using a combination of tombo and lots of patience. I love these pens and will be making a whole lot more to sell at the various markets I have coming up. Anyway, hope you like todays wee projects.
Till next time
Julz
Last night I went to my sisters 40th birthday party so I want to share with you the gift and card - all made with love by me using SU products. Please excuse the photography, we were running late to leave for the party so these were taken around 2am back at her house on hubbies Iphone so quality is not brilliant.
Her favourite colours are red and purple so I opted to put Real Red and Elegant Eggplant together with black to come up with this bold combination for her card, with the focal point of the card being the sparkly panel and 40.
The gift is a recycled can which I wrapped with Black grossgrain ribbon and then finished with a flower made using the blossom punch. This I filled with hersheys kisses and it contained the two roses in Real Red and Elegant Eggplant - they are actually pens, I fashion the roses to the pens using a combination of tombo and lots of patience. I love these pens and will be making a whole lot more to sell at the various markets I have coming up. Anyway, hope you like todays wee projects.
Till next time
Julz
Friday, February 24, 2012
Childrens cards
I have been invited to have a stall at a gala and then a craft fair over the next few months and so have been busily creating new projects and cards in anticipation of this. I start back at uni in a few weeks so am making the most of my current craft time.
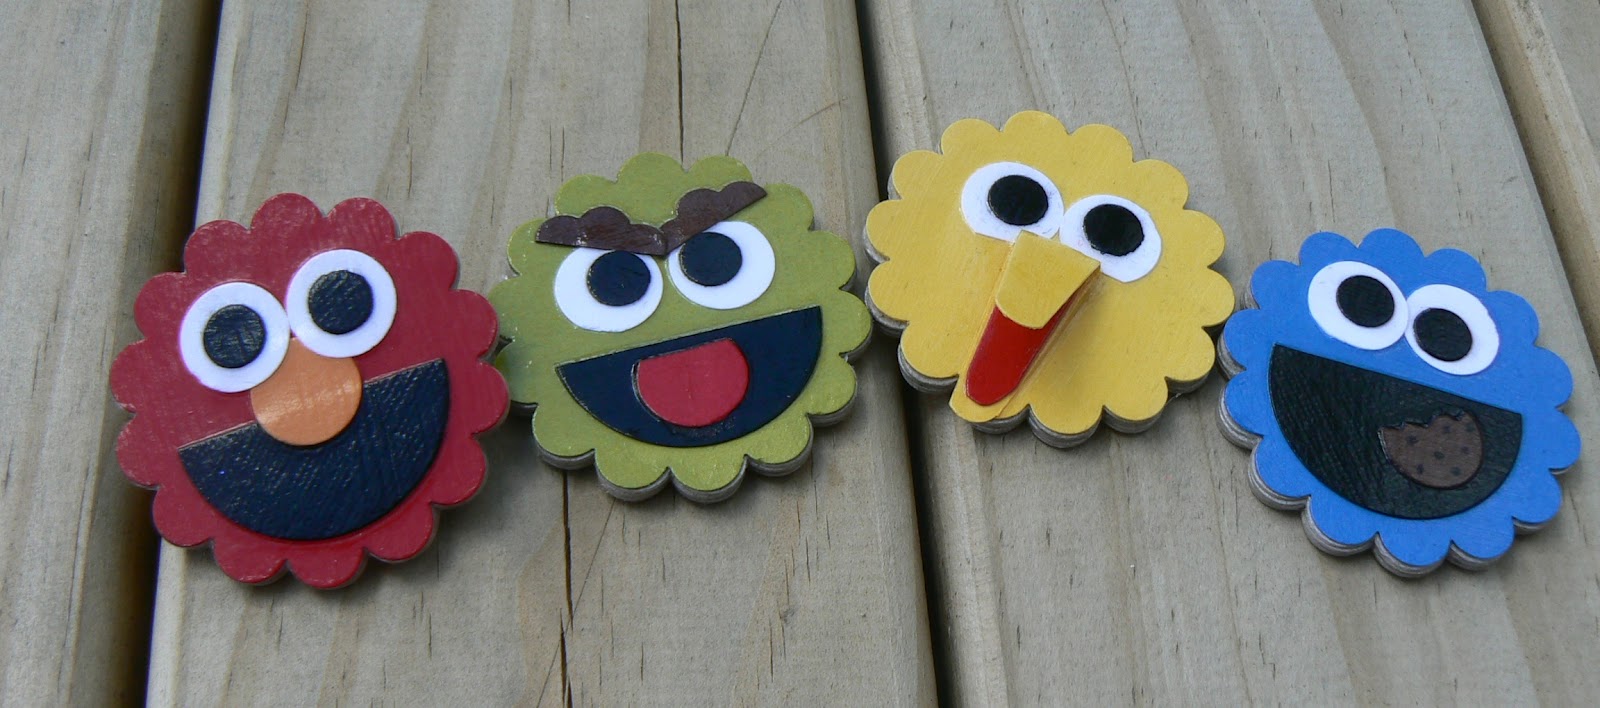
One of the things I have been playing around with is punch art. I have seen many examples on the net before of the punch art characters and thought I would have a go myself. I love what I have come up with. My prototypes aren't perfect but I have been working on mass producing these with a view to being able to put either a magnet back, badge back or clothespin magnet on the back of them after purchase.
This afternoon after having worked on my mass production line I had the idea that I would make some cards using the same punch art. They have come up amazingly well I think, would love to hear your opinions.
Julz
One of the things I have been playing around with is punch art. I have seen many examples on the net before of the punch art characters and thought I would have a go myself. I love what I have come up with. My prototypes aren't perfect but I have been working on mass producing these with a view to being able to put either a magnet back, badge back or clothespin magnet on the back of them after purchase.
This afternoon after having worked on my mass production line I had the idea that I would make some cards using the same punch art. They have come up amazingly well I think, would love to hear your opinions.
Julz
| Punch art badge/magnets |
| Cards en masse |
Wednesday, February 22, 2012
Casing - the card makers answer to brain fog
So I wanted to make a few cards for my stash but wasn't feeling overly in the mood to dream up my own design. Of course this lead me to my stash of swaps from other Paper Divas team members which I have been saving for just this occasion.
I decided to case (copy and share everything) this card below which was a swap I received from the lovely Rhonda Imrie - you can check out her blog here.
The following two cards are my take on her original. Hope you like them.
Julz
I decided to case (copy and share everything) this card below which was a swap I received from the lovely Rhonda Imrie - you can check out her blog here.
The following two cards are my take on her original. Hope you like them.
Julz
Subscribe to:
Posts (Atom)